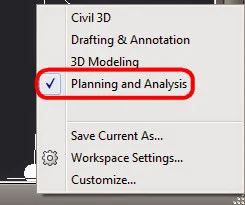
When working in Civil 3D, there are times when we need stuff coming from Map sources. Case in point. Today I needed to label points that came from a GIS shape file. The Annotation Tools in Civil 3D do NOT support Object Data from shape files. You need a mapping tool to do it. But guess what? You have AutoDesk Map built into Civil 3D!
Here's a snapshot of the object and object data I grab.
Lets switch our Civil 3D workspace into Map mode.
We need to create a new label template from the annotation tab
I'll create NEW a label template called NODE-ID
The block editor opens up. and we need to create a NEW attribute tag.
Select the button and press ENTER to create a new tag.
Looks like a regular attribute editor window. EXCEPT it has one REALLY cool button.
The mystery button gives you access to the object data properties found in the drawing.
Move and resize the attribute to suit. I placed my attribute away from 0,0 (which would be my label insertion point) I put a target to show where my 0,0 is, but that's not needed for the label block. You can add as many attributes with Object Data references as you want. I only wanted the node ID in this instance.
Close the block editor and save your changes. Time to apply the label to the objects!
Here's my quick tip! Select your objects BEFORE doing the label insertion. Because in Civil 3D 2014, you cant access the quick select option when you're in insert label mode.
Select the block (manhole in this case) right-click (hope you're using the menu option) and "Select Similar"
Now INSERT your label from the annotation tab
Select the NOD-ID template and expand the window for various insert options.
When you're ready click the INSERT button.
All your blocks have the Object Data you wanted labeled.


