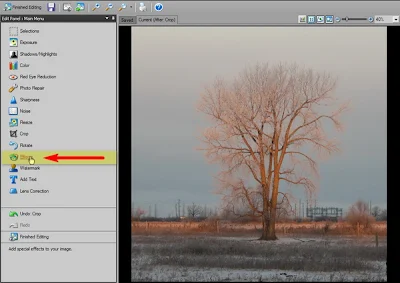
1. Select a square image and go into "Edit Mode". Click on the "effects" menu item.

2. In the Effects menu, select the "Vignette" Tool

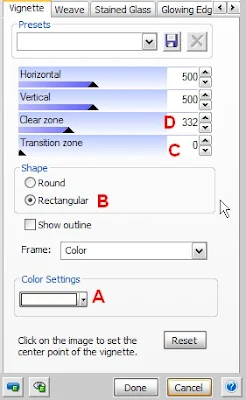
3. Create the first frame of the photo. In this case, i'll make it white. When you have the settings you like, click "Done".
- A = I selected white as my color
- B = I chose the rectangular shape
- C = I set the transition zone to 0 (zero)
- D = I set the clear zone to a size i liked. (332)

4. This is a preview of my white frame. (Note: The black edge you see is the background of my window). If you want a simple white frame, you're done, but i'll repeat the process to create a two color border.

5. Select the Vignette Tool again, and change the settings to the following. Click Done when finished.
- A = Black
- B = Rectangular (same as before)
- C = Transition zone set to "0" (zero, same as before)
- D = Clear zone with a number higher than before. (I chose 335 in this case)


